
One of the nicest mobile phones Nokia have yet produced is the 8210. I was very fond of mine until the screen started going crazy on it. It would flicker and would display random garbage. Sometimes you could coax it back to a brief normality by squeezing here and there (and why not...we're all partial to a squeeze every now and then !) but it was never quite right. While considering whether to (a) throw it in the bin or (b) pay €60 minimum to have it repaired I came across a guy on EBay (Steve Cooke...EBay name 'scookey') selling a tiny little elasomer strip which was supposed to cure the problem. The thing only cost 99p (about €1.40 at the then-prevailing exchange rate) so I figured it had to be worth a go.
Incase you can't stand the tension, I will reveal now that the fix worked. The remainder of this page is a how-to for anyone wanting to try this themselves.
DISCLAIMER - If you undertake this procedure, you do so at your own risk ! I am not in the mobile phone repair business (although at €60 for a €1.40 part and about 10 minutes work, I'm seriously considering it !) and I've only done this once. I can accept no responsibility for any disasters which might befall you or your ailing phone.
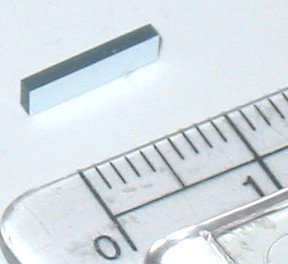
As I said, I got mine on EBay. There seem to be lots of characters selling them there. This is what it looks like...
It is 10mm long by about 2mm tall 1mm wide.
You will need a Torx T6 screwdriver to dismantle the phone. These are pretty small. I got one from a local tool shop without too much difficulty. The guys on EBay selling the elastomer strips often sell suitable screwdrivers also.

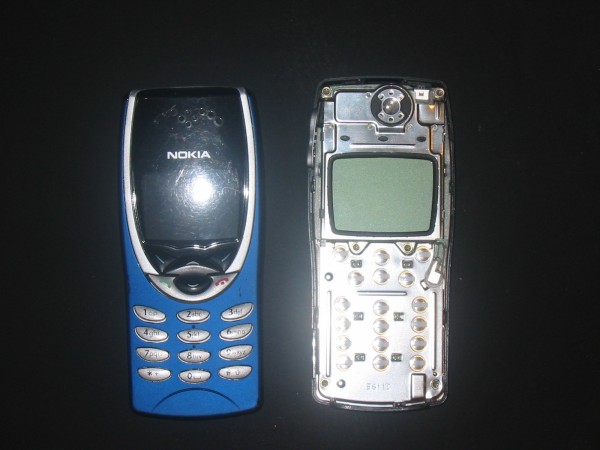
This step will be familiar to anyone who either (a) loves to personalise their phone by replacing the original covers or (b) is an incurable fidget. I fall into the latter category. The cover is simply removed by pressing down on the clip at the top. If in doubt, stop now...it gets much more scary after this !
There are six tiny Torx T6 screws attaching the screen, keypad and main circuit board to the "back" of the phone. Carefully remove these and extract the "insides" of the phone. Be careful that no bits fall out of the back of the phone (such as the SIM card connector)
The location of the six screws is shown below:-

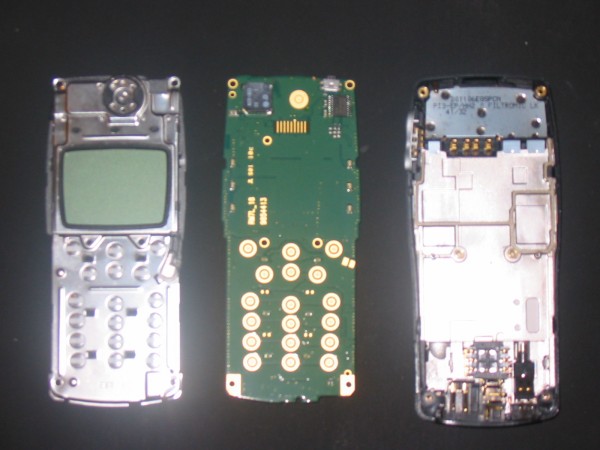
This picture shows the screen/keypad and main circuit board (left) and the back of the phone (right) after they have been separated:-

The screen/keypad panel is secured to the main circuit board with two plastic clips

Carefully detach these clips and separate the screen/keypad from the circuit board.
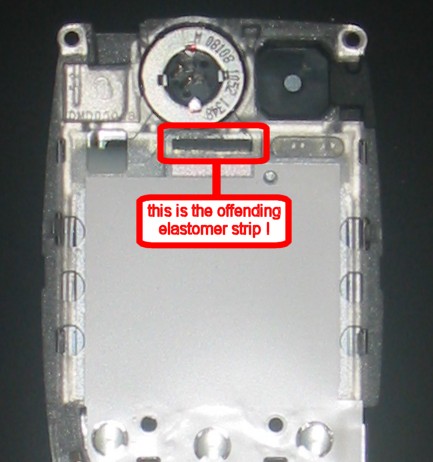
On the back of the screen/keypad panel you will find the offending elastomer strip. It is located near the top, right below the earpiece.
Having first checked that your new strip is the same size and shape, carefully remove the old strip (it may be a little diffult to get out). Then press the new one into place
The procedure for reassembling the phone is the reverse of disassembly. Don't overtighten those little Torx screws !
All going well, your screen will now be working again !
If you tried this and it worked for you, please sign my guest book
For the honours students, there are lots of guys selling replacement colour LEDs for mobile phones now. If you've got a steady hand you can remove the existing boring green LEDs and solder in blue, red or orange replacements. I haven't tried this (yet)...